Keyboard Project
For this project you will be completing the Mac Keyboard and identifying the fingers that are used to type the different keys in a keyboard with a color code. Please read instructions and follow the steps carefully. Use your time wisely! You must be done and return the papers once the class is over. Be neat!
Materials:
- worksheet (provided by the teacher)
- crayons
- pencil
- pen or marker (ONLY to trace when you finish writing everything with pencil)
Step #1:
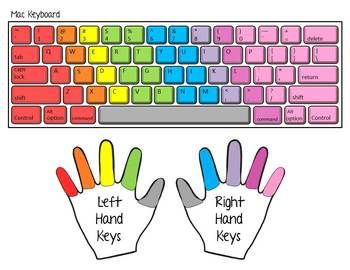
- Use the picture below to complete the Mac Keyboard.
- You do not need to draw the icons in the first row. Just write: ESC, F1 to F12, and Eject.
Materials:
- worksheet (provided by the teacher)
- crayons
- pencil
- pen or marker (ONLY to trace when you finish writing everything with pencil)
Step #1:
- Use the picture below to complete the Mac Keyboard.
- You do not need to draw the icons in the first row. Just write: ESC, F1 to F12, and Eject.
2nd Step:
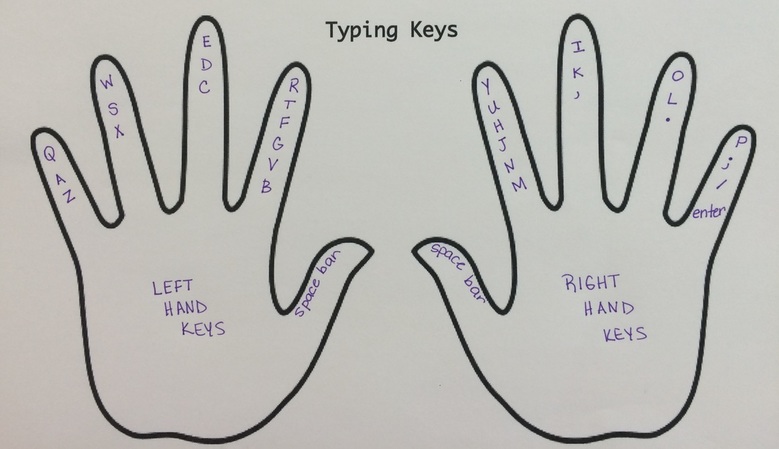
- Write the keys (letters) and space bar as shown in the picture.
- Identify each hand: left/right
- Write the keys (letters) and space bar as shown in the picture.
- Identify each hand: left/right
Step #2:
- Use the picture below to color code your keyboard. You can use the colors you prefer.
DO NOT press crayons too hard. Remember we should be able to read what was written.
- Then, color the fingers with the same color you use for the keys.
- Use the picture below to color code your keyboard. You can use the colors you prefer.
DO NOT press crayons too hard. Remember we should be able to read what was written.
- Then, color the fingers with the same color you use for the keys.
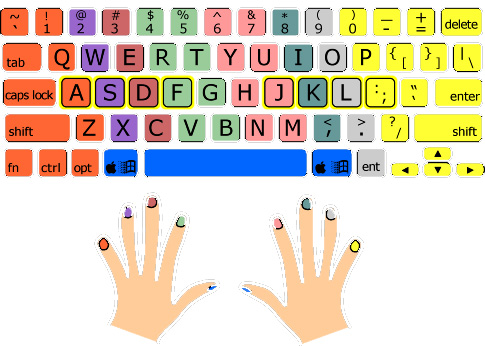
At the end, in terms of color, your pictures should look like this... Fingers and keys touched by that finger should be colored the same.